Saturday, March 23, 2013

The Essential Question: What Is Art For?

Written by Amy Brand
March 7, 2013
Response Paper 1 for Semester 2 of Thesis Preparation Writing Project, GRFA 623 / Fall 2
University of the Arts, Studio Art MFA Program
Writing Mentor: Carol Moore


The Essential Question: What Is Art For?
 

                Ellen Dissanayake sums up my mission this semester in the title of her book, What is Art For? By the definition of art in our present-day Western culture, art is functionless, an idea expressed by the phrase "art for art's sake." As I write this, I am at a point in my life, as a young mother, when my time is more in demand and more precious than it has ever been. Why then, I have to ask myself, should I spend it making art objects, which are functionless? Why do we as a society make art? Why have other civilizations across the globe and throughout time made art?

                In reading Jacquelynn Baas's Fluxus and the Essential Questions of Life, I have found that these are the same questions asked by Fluxus "anartist" George Maciunas.  Baas writes of Maciunas, "He devoted his life to the analysis of what art has been throughout the history of humankind and what it might be good for now," (49). Baas also might as well be describing Dissanayake's  research and writing.

                Whereas Maciunas and I address the question "What is art for?" with the immediacy of being artists , or anartists[1], Dissanayake looks at this question from an anthropological and biobehavioral point of view. Observing that all societies in all times and places have made art of one kind or another,[2] she concludes that the making and appreciation of the arts is a universal human behavior. Assuming that human beings are animals who have evolved over time by the same laws of natural selection as other animals, she concludes that art making and appreciating behaviors have somehow been beneficial to us as a species. In other words, art behavior has been "valuable" enough in the game of survival to have been preserved and passed down.

                 Looked at from this point of view, one could say that the propensity to make and appreciate art is a genetically determined part of human nature. The question is, why were these behaviors advantageous to early humans? What was art for? By digging into our past as a species, Dissanayake strives to illuminate our present.

                Before I continue with Dissanayake's line of reasoning, let me take a look at some of my own half-baked answers to this question, prior to reading What is Art For? Since I am an artist, my concern with the question starts on a personal level: What does art do for me? Then I ask, what does it do for other artists or people who make art (children, hobbyists, students, mental patients, etc.)? Only as an afterthought do I tend to ponder the other side of the question, what does art do for those who view or appreciate it? Up to this semester, my instincts and prior research have lead me to suspect answers embedded in the following areas of interest: play, learning, therapy, and spirituality.

                 Last semester (Fall 2012) I concentrated my research on play, since it had become an important element in my artwork. My research lead me to two main areas of contact between play and art - learning and therapy. First, I will recap the association between play and learning. Play often involves exploration, and thus discovery. In play, children often set up self-imposed challenges to overcome, thereby practicing their problem-solving. Problem solving and social skills are also practiced during group play, in which conflicts between peers arise and must be resolved. As a natural avenue for learning, play has been appropriated by various education reformers as a curriculum tool. Sometimes it is used in a didactic method to impart set curricular goals in an appealing manner. Other curricula incorporate play's potential as a more open-ended avenue for discovery. Similarly, play has begun to be appreciated and cultivated by adult professionals for its role in creative problem-solving, design, and artistic expression.

                 As an artist, art-educator, and mother (i.e. the teacher of my own young children), I find the association between art, learning, and play to be useful both in my teaching and my practice of making. I seek to reach a spirit of play in my art making, which can open up roads of discovery. When discoveries are made through play it makes learning joyful and more deeply experienced, play more satisfying, and art-making more original. This statement applies equally to my own artistic process as it does to educational art-activities I plan for children. Increasingly, I find less desire to distinguish between the playful, artistic, and educational activities I engage in as an artist, teacher, and mother.

                The other main branch where my research on play lead me is therapy - various forms of play and art therapy for children and adults. Play therapy can help a child resolve their emotions, and can also provide a therapist with a "window" into the child's experiences and inner world. It seems that play therapy, first developed for use with children, more recently has branched out into therapeutic work with adults. Play therapy, often in artistic forms (such as art therapy, music therapy, and role-playing) helps adults who find it difficult to speak about their experiences or feelings in a traditional talk-therapy format. These methods essentially work by allowing an alternative road into difficult issues, a road that bypasses the roadblocks of the conscious, logical mind, providing insights, and allowing the individual to "work through" their issues. Aside from the insights various forms of art therapy provide, the very process of making art, playing music, or engaging in role-play can be healing.

                As I researched the therapeutic value of play and art, my mind automatically leaped to a similar value in spirituality. I had already been interested in the spiritual components of contemporary art, and how art can provide a spiritual release for its maker. I had touched on the topic in my research on artist Tracey Emin during the summer of 2012. I also encountered the idea of contemporary art as modern form of spirituality in the novel I Capture the Castle, which I quoted in my final paper for the summer. This connection stood out to me because it resonated with my personal experience and views. Furthermore, therapy and spirituality  both concern themselves with the inner life of the individual and healing. Whereas therapy takes the scientific, modern road of psychology, spirituality and religion take an older, less well-defined, but potentially broader path. While the two areas are related, I feel that both can be explored productively, and simultaneously, by the modern individual.

                Now we return to Dissanayake's exploration of our question, "What is art for?". After laying out her biobehavioral premise, she goes on to explore the central question by asking two subsequent ones - "What is art?" and "What does art do for people?". Asking these questions and trying to answer them from an anthropological point of view reveals the messiness inherent in our present concept of art. In our culture, we display artifacts from "primitive" societies  alongside modern abstract paintings, appreciate them all for their "aesthetic" qualities and call them all art. But in their original contexts artifacts from primitive societies served a very different purpose (facilitating ritual ceremony or decorating utilitarian items) than the abstract painting, which represents the modern Western concept of "art for art's sake". Ultimately Dissanayake reveals that while "art" objects from other cultures have aesthetic value as we define it, their original meaning does not fit with our own definition of art. Our present view of art, which divorces aesthetics from other concerns or meanings, is unique, and has only developed since the 18th century (Dissanayake 41).

                Dissanayake attempts to consider the concept of art from every possible angle; she looks at every variation of "the arts," from the highest and most elite fine arts, to the lowest and most popular representations of decoration and entertainment. She attempts to parse out every possible purpose any and all of these might serve in our lives. Her examples range from the ancient to the contemporary, from modern to primitive. She touches on potential answers to her question which I had previously considered, and many I had not.  Gratifyingly, ritual and play emerge, by Chapter 4, "Making Special" Toward a Behavior of Art, as top contenders for study, related behaviors which also have antecedents in the animal world.

                In addition to Dissanayake and Baas, I selected Joseph Campbell's Myths to Live By, as a source for cross-cultural comparison, concerned with religion, magic, and storytelling. Myths to Live By is a collection of lectures, selected from ones Campbell gave at Cooper Union from 1958 to 1971. As such, it provides an accessible, manageable overview of his philosophy, and an easy inroad to the mind of this influential thinker. I concentrated on the first three chapters, or lectures, which I found to be most immediately relevant to my reading of Dissanayake: I The Impact of Science on Myth, II The Emergence of Mankind, and III The Importance of Rites. While I found Campbell's analysis and interpretation of specific myths, and their comparison to counterparts in other cultures, insightful, I was disappointed with his larger reflections on society. These come across as surprisingly socially conservative, at the same time that his universalist view of religions and acceptance of science would seem to advocate a progressive point of view. Still, I look to his cross-cultural comparisons and understanding of universal themes in storytelling to inform my own studio forays into writing and story this semester.

                Now turning to Fluxus and the Essential Questions of Life; I was struck by the parallels between Dissanayake and Fluxus. It became evident to me that Dissanayake's thinking had been influenced and provoked by the Fluxus movement and its artistic descendants. Toward the conclusion of her book, Dissanayake observes, "Although art is no longer part of life as in the past, when it was the handmaiden of significant and vital activities, much avant-garde art today is concerned with giving art back to life, rather than relegating it, as in the past few centuries,~ to the remote and special worlds of the museum or concert hall, where it is intended to be experienced by an elite sporadically and self-consciously as 'works of art,'" (191). In the paragraphs that follow this statement, she explicitly names artists and movements tied to Fluxus, such as John Cage and Happenings.

                Dissanayake's answer to the question "What was art for?" in evolutionary terms, is that it supported ritual ceremonies which served the selectively valued purpose of uniting social groups. Similarly, Jacquelynn Baas writes in Fluxus, "Maciunas regarded art at its best to be part of the social process, as it had been from prehistoric times to the Renaissance," (49). The answer that Dissanayake finds to the question, "What is art for?" in our own culture, is that it echoes its earlier function in relation to a secular society; it is a way for individuals to construct and find meaning in their lives in a modern society which has become more isolating and increasingly devoid of such comforting "illusions" as religion.  In the conclusion of her thesis Dissanayake writes, "To those who value it, capital-A art is a way of possessing sacredness and spirituality in a profane world; art in everything or everything-potentially-art is a way of imposing coherence (shape, integration) on selves and experiences that have fragmented," (192). Here she is describing and explaining my own stated goal of integrating art and life.

                 Maciunas's goal is closely related to mine: the "end of art... its absorption into the practice of being human" (Baas, 2). However, while reading Fluxus, I noticed that two main problems arose from this goal. One was the problem of professionalism; the total elimination of art as separate practice also eliminates the profession of being an artist. This was no problem to Maciunas who was the quintessential radical in every way, but it lead to a schism between himself and other Fluxus artists who were not willing to go so far as to eliminate themselves and their own profession (Baas, 30). The other problem that I found as I read Baas's book, is that while the goal of the Fluxus artists was to democratize art, by taking it out of the hands of elite makers, buyers, museums, etc. - when they reached the most radical stages of this plan they had so distorted the recognizable shape of what most people call "art" that they essentially had rendered it elitist again. Baas writes, "The ideal Fluxus composition, in Maciunas's view, would function as a kind of readymade, occurring automatically, without any 'special' performance. All one need do is notice it," (28). The problem is, who would notice it? In this scenario, only the most knowledgeable insiders would be capable of recognizing a work of art at all. Perhaps this is why the less extreme artists associated with Fluxus, such as Alan Kaprow, are the ones whose names have become most familiar to us today. Though they pushed the boundaries of art, their work remained recognizable as art, rather than becoming indistinguishable from life.

                Ellen Dissanayake does such a remarkable job at dissecting, defining, and rationally stating my own views and goals as an artist, that one might ask, "What remains for me to do in my research and writing?". Luckily, Dissanayake's writing is rich, complex, and sensitive enough to leave plenty of room for further, personally relevant exploration. Two topics I am interested in investigating more deeply are: 1) the importance of rules for escaping oppressive freedom and creating meaning, both in art and life and 2) storytelling in spirituality and art.

Examples of Studio Work...
Last Semester's Work:
The Zoo Installation, Fall 2012, Photograph of Closing, Amy Brand


Last Semester's Work:
My Cave, Installed at Uarts for Winter Critique, December 2012, Photographs of exterior view and various details. Amy Brand


This semester's work, so far...
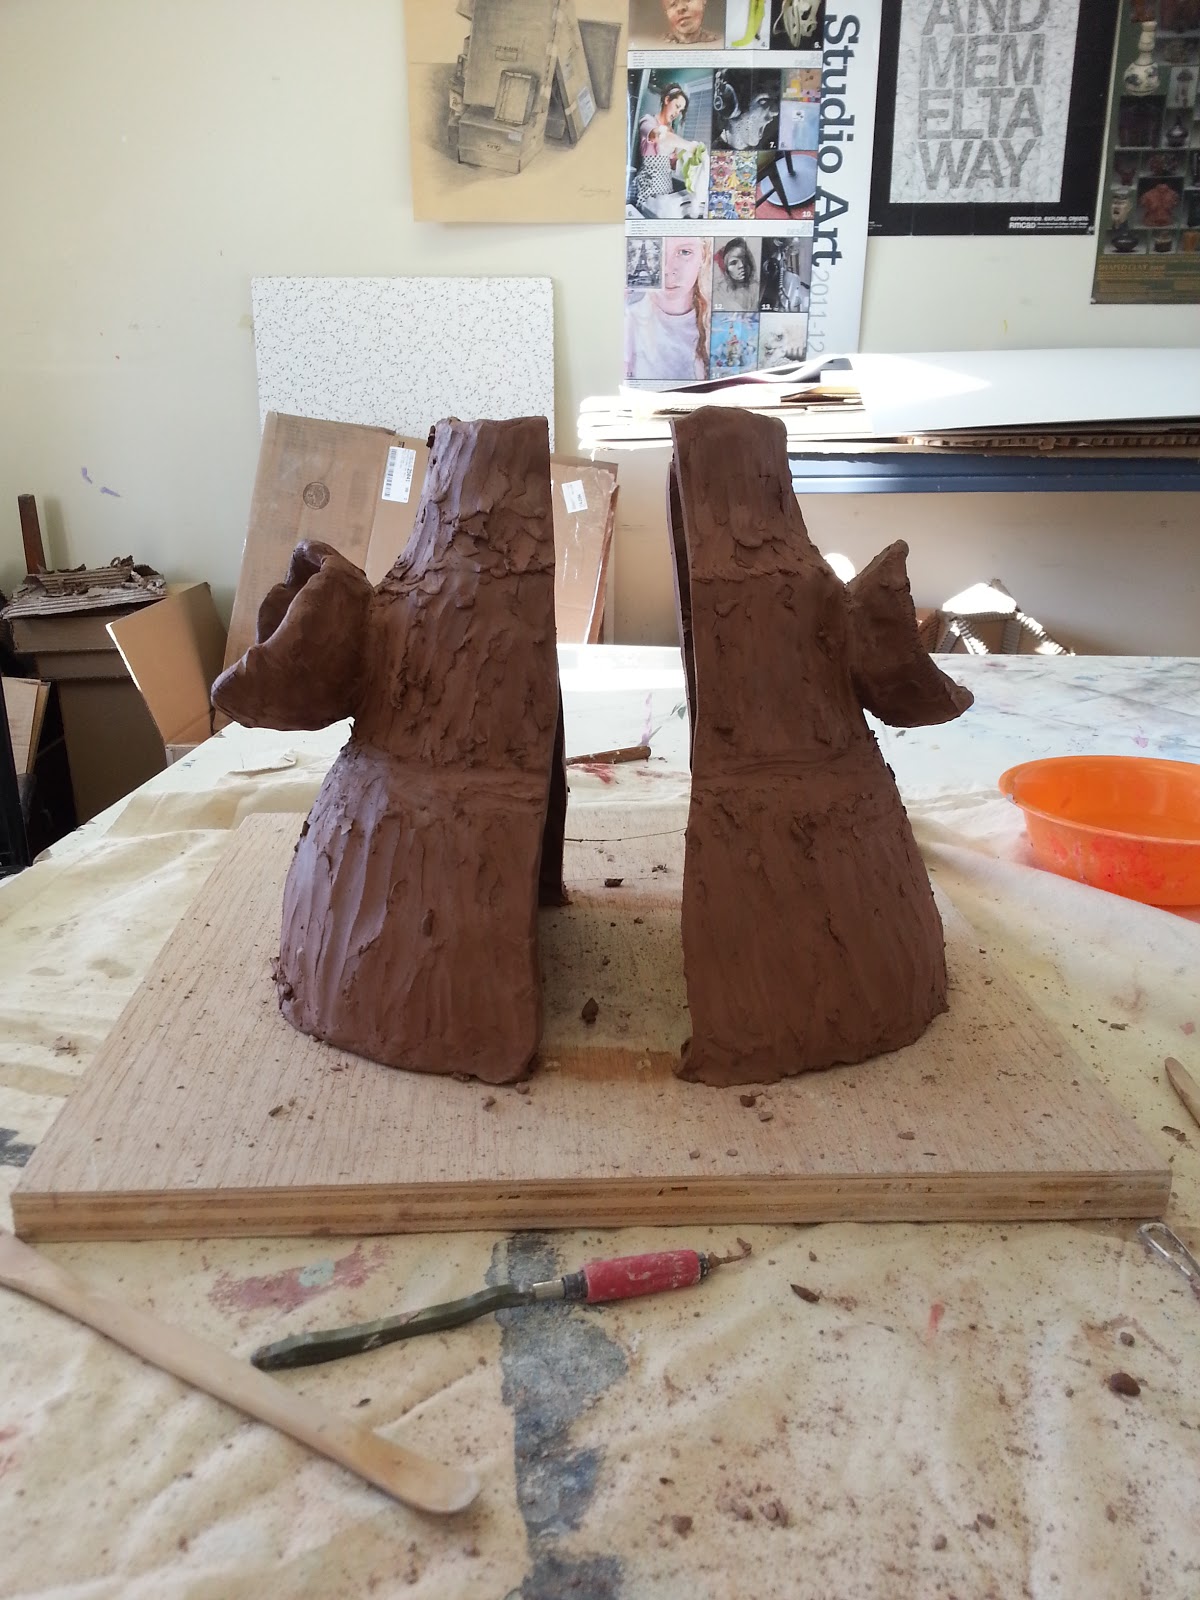
Sneak Preview of Spring 2013: Little god 1, Mouse Girl, Work in Progress, Amy Brand
Bibliography

Baas, Jacquelynn. Fluxus and the Essential Questions of Life. Chicago: Hood Museum of Art, Dartmouth College, in Association with the University of Chicago, 2011. Print.
Campbell, Joseph. Myths to Live By. New York: Viking, 1972. Print.
Dissanayake, Ellen. What Is Art For? Seattle: University of Washington, 1988. Print.


[1] A term coined by Marcel Duchamp. Baas quotes Duchamp speaking to Richard Hamilton in a 1959 radio interview, "I'm against the word 'anti'... because it's very like 'atheist' as compared to 'believe.' An atheist is just as ... religious... as the believer is, and an 'anti-artist' is just as much of an artist as the other artist. 'Anartist' would be much better... meaning, 'no artist at all.' That would be my conception," (2).
[2]Dissanayake defines art for the purpose of her book as all forms of visual, linguistic, and temporal arts, of both high and low status within their respective cultures.

More thoughts from the Studio... Are the baby days going away?

Taken from the following Momastery blog post: http://momastery.com/blog/2010/04/21/st-francis-and-the-sow-2/ which has been a big inspiration in my current artwork.

Lesson I'm Learning: Try to appreciate whatever you are doing, whatever experiences and stage of life you are in at the moment... it only comes once. (This was my Mom's only advice when my first child was born. It was good advice, and as I get older, I realize more and more just how true it was.)

Just thinking of how much I love being a mom, how I love my babies, how they are no longer babies, and they will never be babies again, and I likely will no longer have anymore babies... Weirdly, drawing a picture of a mother sow and piglet triggered this thought.

As I try to capture the lines and forms of this baby pig, I think...
Newborns are so skinny, fragile, and tender, no matter the species. (Actually, it's incredible how mammal newborns resemble one another; this piglet bears a striking resemblance to a laborador puppy...) I miss having my own newborns. Greta is 13 months old now and toddling all over the place, playing with other, older kids, and having her own adventures. I miss both my children as newborns, though I revel in their growth.

Each rite of passage spurs a pang of pain, no matter how longed-for and anticipated. We recently registered Kurt for 3 year-old pre-school for the fall. It's just two mornings a week, a total of 5 hours. Even though I was the one who had pushed for this ("It's educational. It's a little "break" for me, a chance to spend quality time with our 1 year-old and get a little work done..." etc.), when Jacob finally agreed, and the decision was made, I immediately felt a stab of pain in my gut. I thought, "This is it; he's starting to leave me! Next he'll be going off to college and leaving me forever...".

Ridiculous, I know. And it probably says more about my own complicated relationships with both of my parents,who live in different states, and whom I am not nearly nice enough to (Honestly, if I were my own daughter, I'd be quite disappointed with myself.), than anything else. 

Anyway, I "got over it," signed the check, and mailed the registration form. Kurt and I are both so excited for school in September; we talk about it all the time! Still, the ambivalence lingers...

I miss my babies as babies, as newborns. I wish for another baby (although my practical side says that two is enough)... I wish for one last baby.

He or she would be a "redo" baby. A chance to relive the whole magical experience, from pre-conception, to pregnancy, to labor (maybe a chance to have that magical, natural birth I dreamed of in my second pregnancy), and through all the treasured first year milestones which come so fast and furious that they're gone before you get a chance to write them down. (This time I would be prepared! I recently discovered a "Mom's line a day journal," and I  swear I would use it, unlike the half-empty baby books and scrapbooks I already own.)

I just long to savor it all and appreciate it, knowing that it is the last time. I feel robbed of this chance, as prior to conceiving Greta we had always talked about the possibility of having three, my husband being the more enthusiastic about this idea, out of the two of us. But somewhere between our older child's birth and the 20 week ultrasound for our daughter, Jacob started saying things like "Well if the second is a girl, maybe we'll just have two...". He was the one who talked me into the whole idea of having three or four to begin with, then he turns around and changes his mind? Unfair!

Still, I see his point. Kids are exhausting. Kids are expensive. Eventually we'd like to have our lives back, as individuals named "Amy" and "Jacob" instead of "Mama" and "Papa", not to mention our life as a couple. We both have other things on our Life to-do lists. If we stop with the babies now, we might just accomplish a few of them.

And yet... I long for one last baby, one last everything. One last chance to "fix" my mistakes. Of course I know that you can never really do that. But I feel like I've learned so much on this journey of motherhood, that I just want one last chance to try to use all of the knowledge I've gained from the first two rounds.

Thank you Kurt and Greta for all of the lessons learned. Maybe the best thanks would be to just let you be the two and only, sharing the throne of Mama and Papa's hearts, our best boy and best girl.

Or would an even better thanks be a new little sibling...?

Thursday, February 21, 2013

Fairy Houses by Tracy Kane

DSC_4715
Photo of a fairy house built by one of Tracy Kane's fans
(Originally from the fairy houses website)
 
This is already a big movement apparently, but it's new to me. I just discovered the book Fairy Houses by Tracy Kane at my local library, and I'm so excited about it! Here is the companion website where you can see houses made by fans, gatherings and events, and so on:
http://www.fairyhouses.com/

As soon as I started reading this book to my son, I couldn't wait to build my own fairy house! Then I started thinking about how I could scaffold this idea down to a level that pre-schoolers could handle.

I can't wait to do a pre-school version of this activity with my Mom's Club!

Wednesday, February 20, 2013

Pre-school Lesson Plan / At Home Activity for Toddlers: St. Patrick's Day Shamrocks

Sub-title: A lesson about color mixing and symmetry.
 
This lesson could use a variety of shapes for a variety of different holidays, times of year, or other occasions. In fact, this was initially supposed to be a Valentine's Day project using hearts. When it got bumped to the week after the holiday it became a St. Patrick's Day project using Shamrocks. I also saw the opportunity to put a greater emphasis on mixing colors than the heart project would have given. Another common spin on this project is a butterfly shape.
 
Materials:
White construction paper or craft paper
Pencil
Scissors
Tempera paints, Yellow and Blue
Brushes or paint sponges
 
Prep:
1. Put several sheets of paper together and fold them in half vertically.
2. Use the fold as your line of symmetry, and draw one half of a shamrock or 4-leaf clover design onto the page. I googled images of shamrocks and clovers as references to help me make recognizable basic shamrock and clover shapes. Just keep them simple and sturdy for young hands.
3. Cut out your design, so that when you unfold the page it makes a symmetrical shamrock or clover.
4. Repeat until you have enough blank shamrocks and/or clovers for your group. Remember to stack your paper so you get several shapes out of each cutting session.
5. Set up your painting materials - a vinyl tablecloth to cover your work area, plastic take out containers and lids make good paint palettes. You may or may not want to set out water cups for dipping paint brushes, depending on your kids and how likely they are to spill them!


Activity Plan:

1. Introduction: I'll be doing this project with a group of toddlers and pre-school kids for my local Mom's club. In an attempt to keep things organized I'll use the following "signs".


We'll read the sign on the left first, to discourage a mad dash for the supplies! I also like to do the intro as far from the supplies as possible, usually seated on the floor, away from the work tables.

Then I'll read the letter on the right. I learned the "letter" style intro from my student teaching mentor, Laura Gibson. She is an excellent elementary art teacher!
Then I'll show the kids the supplies, saying:
Me: "Uh oh, what color are these clovers?".
Kids: "White!"
Me: "What color are shamrocks and clovers supposed to be?"
Kids: "Green!" (Or maybe they won't know! We'll see!)
Me: "Well we can paint them! But wait, I don't have any green paint! Does anyone know what two colors we can mix to make green?"
Answer, supplied by the kids or me - Blue and Yellow!
2. Demonstration: Still in the introduction area, demonstrate using the sponges to apply the yellow and blue paint, dabbing and mixing them on the white shamrock paper. Keep the paint on one side of the fold only. Then fold the shape in half so that the paint makes a print on the other half of the paper, a symmetrical design.
Point out things that one does NOT do with the paint, such as paint oneself, the floor, etc.
3. Have the kids go to the work area and begin to paint. Remind them to keep their designs on one side of the fold, then help them fold the paper to make a symmetrically printed design. Keeping the paint on one side only may be too difficult for many toddlers, but that's ok. They can still fold the paper (with help) to make a symmetrical design.
4. Clean up!
- Have kids put sponges and brushes in a clean up bucket.
- I like to use wipes for clean up with toddlers and preschoolers. It allows them to help too.

Total Time for Activity with Introduction: Aprox. 20 minutes

Note for parents: Toddlers will usually paint for only about 5 to 15 minutes at a time. It can be a lot of set-up and clean-up work for such a short attention span, but try not to get frustrated. It helps when you know what to expect, and that it is perfectly normal! This is also one of the reasons I like to do activities with groups of friends - more parents to help with set-up and clean-up, and it feels like it's "worth it" when more kids get to participate.

Extensions:

You can use these ideas to keep kids' attention on the activity a little longer, especially if you are a teacher using this lesson for a class period that is longer than say, 30 minutes.

1. Multiple shamrocks for each kid. Done already? Have another!

2. How much of the paper can you cover with paint?

3. Can you make designs with white (negative) space and the paint?

4. Use the wrong end of a brush to scraffitto into thick paint.

5. Paint on different colored construction paper

6. Use shaped sponges to make prints

7. Add more colors and try mixing those.

Note: A lot of kids will want paper after paper to paint on, each for about 60 seconds. To slow them down a bit, before they run through all the paper in the room, suggest they add to each one before calling it "done". I like to say, "That's great! Now try adding __________ (scraffitto, a sponge printed shape, more paint, designs and patterns of marks, etc.)!"

 
Examples of work: These are from doing the activity with my Mom's club...

Participants were 1.5 to 5.5 years in age. Moms helped a lot with managing materials and clean-up, but didn't neat to assist too much with the painting, with the exception of the under 2 set.


Tuesday, February 19, 2013

Lesson Plan / Process of a Project: Building a Portrait Bust... in this case of a Mouse

Project: "Small god #1: Mouse Girl" 
(Alternate title ideas... Minimus deus?)
 
This post follows my process in building a ceramic portrait bust, which happens to be of an anthropromorphized mouse. In documenting the process, I hope that it can be used as a guide for students on how to develop a project from sketch stage to completion, as well as a specific reference for building a portrait bust using the coil method.
All photography is by me, as I worked, so getting shots of my hands employing techniques was not possible. Still, I hope this is useful.
 
Step I. Sketch: In this case my idea was to come up with characters, of which I plan to make small figurines, as well as larger (tabletop size) ceramic sculptures. Here are my original sketches for this character.
 
 
Step II. Research, then sketch some more: There was a lot I didn't know about mouse anatomy. I also, had to come up with a solution for making a tabletop ceramic piece that could stand on its own. I settled on the idea of a portrait bust.
 
Here are some of the reference photos I used for mouse anatomy, the sketches I made from them, and my final sketch for the ceramic bust.


 Step III: Start building the basic form of the bust, using the coil method.
 
 
The line down the center of this form is illustrating the "clay surgery" documented below. When you begin building, you won't have such a split or line.
 
Tips for students:
1. Keep your tools, extra clay, and sketchbook nearby.
2. Keep your extra clay in a plastic bag to keep it moist. Your clay should be firm but flexible. If it starts to crack when you bend it, add water. If it's gooey or collapsing, let it dry out a bit.
 
 
See how my extra clay is kept inside a plastic bag so it doesn't dry. I also have a bowl of water and a spray bottle handy to rewet it.

 Troubleshooting: Students often have problems with handbuilt pieces becoming too thick and heavy. You need a certain amount of thickness while building in order for the clay walls to support themselves, but if they are too thick you are more likely to run into trouble with air bubbles in the kiln.
 
Solution: "Clay Surgery"
(You can also use this "surgery" if your piece is simply too big.)
 
Clay Surgery, Step 1. Cut sculpture in half with a wire tool. This process is best started when the piece is still rough and without detail.

 
Clay Surgery, Step 2. Use a tool to scrape excess clay from the inside of the sculpture's walls. Pay special attention to places where the clay is thickest. Your goal is a uniformity wall width.

A cross section of my sculpture, along with a ball of clay that has been removed from it.
Clay Surgery, Step 3. Rejoin the two halves of your sculpture. Make sure to score, splip, and then patch with a bit of extra clay on the surface of the opening.

 
Step IV. Continue building the rough shape of your piece. When you add large surface details or forms that adjoin to the body, like the arms on this piece, make them hollow, and creat a hole in the wall that they attach to, which opens into the large hollow center of the piece. This way, no part of your sculpture will be too thick, and no part will trap a large air bubble.


Troubleshooting: Another common problem is for the sculpture to get too wide, or fail to narrow when the sculptor wants it to.
Tips:
1. Build it narrower than you want it to be.
2. Curl the top edge in as you work (see the photo above).
3. Use a hand or finger to support the clay from the outside as you add each coil.
4. If your form has already gotten too wide, perform "clay surgery" (again).

In this photo, part of my sculpture has become too wide. I have built the back of the skull out too much, more like a human (my usual subjects) than a mouse. So I am performing "clay surgery" to bring it back in and achieve the form I want.
2nd Clay Surgery, Step 1: Trace the outline of the piece you want to cut out, usually a V shape. In this case I just need one. Often you need two on either side of a symmetrical form. You may need more than two, just keep in mind that they need to be centered, or at opposite points, in order to maintain the symmetry of a form.
 
2nd Clay Surgery, Step 2: Cut

2nd Clay Surgery, Step 3: Bring the edges of the clay together, score, slip, and patch to repair. You may need to continue to adjust the sculpture until you get the form you desire.

For smaller changes, you can push the clay out from the inside of the form, or pinch it in from the
outside.

Step V: Continue to build up the basic form of your sculpture, finally enclosing the top of the head.

Step VI: Add details.
Most details will be added by adding onto the outside of the form, as show below.

Tip: You can also make subtle adjustments by pushing, pulling, and pinching the clay. Many adjustments are best made from the inside out, so you will either want to make them before you close up your piece, or at a point when it may be cut open during clay surgery. Don't be afraid of making BIG changes to your work in progress!

Tip: DON'T BE AFRAID while making art, in general! I used to waste a lot of time hemming and hawing over every little descision. As I have gotten older and have gained experience I realize it makes much more sense to just pick a direction and go for it. Even if you make a mistake, you end up saving so much time that you have plenty of time to fix it. Or even better, you can start fresh and make a second work, in which you go a different direction. That is how series are born. Most professional artists work in series, in which they can explore several directions for one central idea.

When adding symmetrical details, like ears, build both up at once, rather than completing one and then the other. This will allow you to see differences, and correct them, as you go.

Tip: On the other hand, you may not want a PERFECTLY symmetrical sculpture. In nature, things are rarely perfect. Small "flaws" in symmetry, whill make your sculpture look more natural, more like a real person, or in this case, mouse.


Adding the brow bone. These start as coils, but will be smoothed in on the edges to create a more subtle effect. In places, more clay will be built onto the surface of the face, in others, the form may be pressed in, or carved away.

For the eyeballs, I form a clay ball, then cut it in half. Each half sphere will be scored, slipped, and attached to the proper place on the face. See below.

The brow bone is still rather severe here. I will add a bit more clay to the surface of the center forehead to achieve the desired effect. I will also add coils for the upper and lower lids on the eyes. A nose  and dimples where the whiskers protrude are also forthcoming, etc.

 
Step VII. Continue to add details, using slipping and scoring to attach coils, slabs, etc.
 
Step VIII. Texture.
Create different textures where appropriate. In this case I carved out a "furry" or "hairy" texture for the mouse's body. For the dress I wanted a smoother look, which I achieved with my finger, a damp sponge, and various tools to scrape and polish. I worked on the textures in many short sessions, in stages if you will.
 
Tip: Don't rush texture. I like to do the final touches in many small steps as the sculpture slowly reaches different levels of dryness. This is especially effective for achieving a smooth texture.


Final Tip: It's never too late to make a big change! Ok, that's not true. With clay, there is a point of no return. But you can still make big changes at the leather hard stage. After an informal critique with a fellow artist, I added a tail snaking up the back of this piece, my friend's suggestion. My first reaction was, "No, it's too dry. It's too far along. I've made enough major changes." I was scared. But I remembered my own advice not to be afraid, and decided to go for it. Thanks for the idea, Jean! (pictures are coming)


Another big change, made after most of the photos taken here: I decided the neck was too long, so I cut the whole head off with a wire tool and removed about an inch of clay in height, then reattached the head. Don't be afraid!

Thursday, February 14, 2013

Lesson Plan (from the Archives): Fairytale Mixed Media Painting, High School


Mixed Media Assignment


Problem: You will create a collage using found images which illustrates a traditional story, such as a myth, legend, or fairy tale. You will then use this collage as the basis for a painting or mixed media piece.


Part I: Collage using existing images


Step 1: Brainstorm stories in which you are interested. Think about the visual possibilities of each tale. Choose one.


Step 2: Collect images from magazines. You may also look up and print some images, however, avoid using pre-existing illustrations of your tale as much as possible. Your finished collage will be more interesting if you push yourself to use originally unrelated images in a creative manner.


Step 3: Paste your images to a heavy paper to form your collage. Think ahead of time about images that should overlap.


DUE TUESDAY – one week from today


Part II: Mixed media piece using your collage as a basis


Step 1: A ground – choose one or more general colors to paint the entire surface of your paper


Step 2: Underpainting – paint the basic shapes of the images you see in your collage


Step 3: Adding details – you can continue using paint, or use markers and pens as well


Step 4: Collage items – cut images out of paper, or find pre-existing images. You can also add more unusual materials such as fabric.


DUE: End of marking period

Cinderella: Collage from pre-existing found images.

Cinderella: Pencil drawing done from the above collage.
 
These two Cinderella illustrations take an early, Grimms Brothers, version of the tale for inspiration, which differs significantly from the Disney movie. The grave of Cinderella's mother, and the tree that grows on it, figure prominently in the older story. The tree itself replaces Disney's fairy godmother, with Cinderella's gown falling from it's branches. The birds are Cinderella's other helpers and saviors.
 

Thoughts while working in the studio this morning...

Morning of February 4th, while working in the studio...

On craftsmanship: I am not terribly interested in perfection, in a physical sense, because the physically perfect has become commonplace. We are surrounded by mass-produced objects, each identical, each perfect. We are also surrounded by images of perfect bodies in the media, which have usually become that way by artifice - surgical or digital - and which too have become almost identical in their perfection. I am more interested in the flawed and handmade, in the wabi-sabi aesthetic, and most of all, in the ideas behind the physical form. The quest for perfection bores me. Experimentation with new forms, ideas, and materials fascinates me, but leaves little time for perfection.

Why do we fall in love with the people we do?
Often times we see in them, or seek in them, what we are lacking. My friend S is quite the showman, but often times his showmanship is at least partially constructed of bullshit. He chose for a partner a woman who is exceptionally intelligent, but also exceptionally quiet and reserved, the opposite of himself. She does not put on any show, but suddenly may reveal a depth of understanding previously hidden. As for myself, I am kind but often oblivious, my husband is very aware of others, but does not always choose to be kind. And yet there must also be some common ground. We both value loyalty, honesty, intelligence, and a good story.

All in all getting up, eating breakfast, then going to the studio for two hours was not a bad way to start the day. While it was a bit rough getting going, it put me in a good mood for the rest of the day. I'll have to make this a weekend morning routine. (Today was like a weekend because Jacob had off from work.)
Work in Progrress: Cardboard armature for "dollhouse/gameboard" piece. Aprox. 24" high.